
Modern browsers have an autofill option that makes it easy to sign in to different websites using different credentials. It can be a privacy nightmare if you share a computer or smartphone. This article will explain how to disable autofill for forms and websites in Google Chrome desktop and mobile to protect your login credentials.
Google Chrome Autofill: A Step-by-Step Guide (2021)
Autofill is generally enabled by default. However, all major web browsers allow you to disable it for privacy reasons. Even though signing in to websites is a bit more difficult, it’s often a good idea to disable the feature. Here’s how to disable or turn off autofill in Google Chrome.
Google Chrome Autofill for Desktop (Windows, Mac, Linux)
Notice: For this demo, we are using Chrome on Windows. However, the process for disabling form automatic filling is the same on Mac and Linux computers.
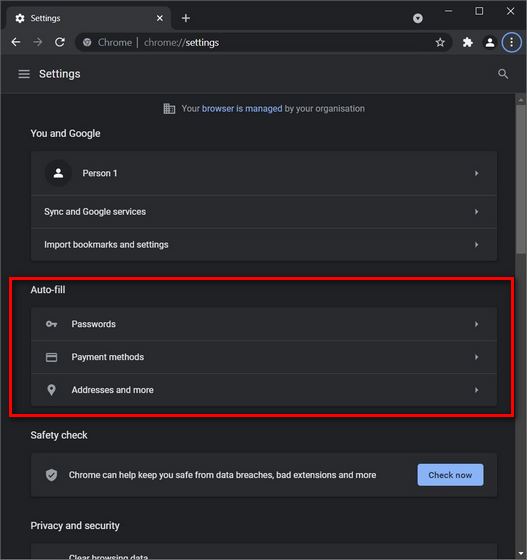
- Open Google Chrome on your computer. Click on the three dots menu button in the upper-right corner. Next, click on “Settings” in the drop-down menu.

Note: Copying chrome://settings from the Chrome address bar can be used to access the Settings. Click Enter to get there.
2.In the Settings window, locate the Autofill section and disable autofill under each of the following categories: Passwords, Payment Methods, & Addresses.
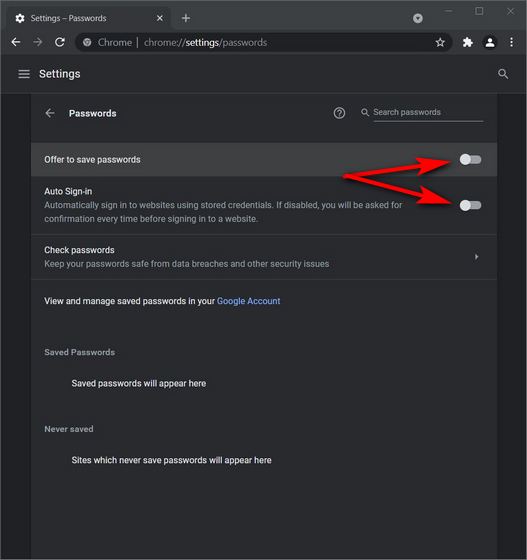
3. Click on Passwords first. Next, turn off the toggle next Offer to Save Passwords. It will stop passwords from being saved and automatically filled on your device. If the Auto sign-in option isn’t already turned off, you can also toggle it off. It will prevent the browser from automatically signing you into websites with stored credentials.
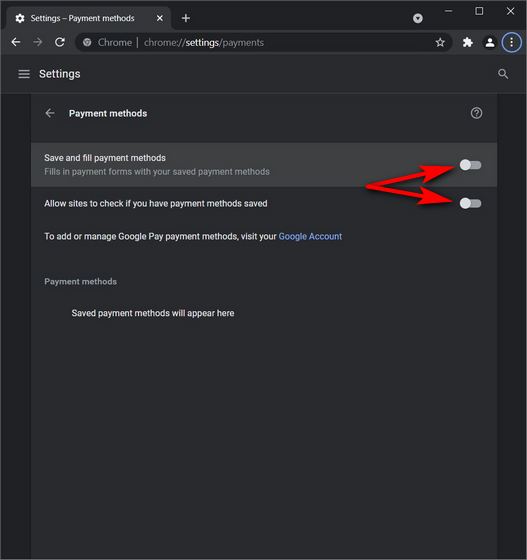
4. Go to the Payment Methods section in Auto-fill Chrome. On the next page, disable the toggles to enable the Save and Fill Payment Methods and Allow websites to verify if payment methods are saved options.
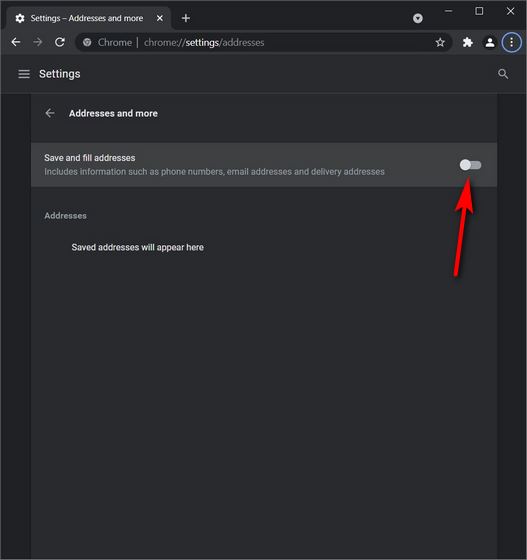
5. Next, go through the same process as above for Addresses & more. To stop Google from suggesting phone numbers or addresses when filling out forms, turn off the toggle next to Save and Fill Addresses.
Once you have disabled autofill in Google Chrome, it will not fill any information on any form on your computer in the future. Retrace your steps to re-enable Google Chrome’s autofill. Depending on the information you wish Chrome to autofill, you can turn off one or two toggles.
Remove Autofill Information from Google Chrome on Desktop
We recommend that you also delete any saved passwords or other autofill information from Google Chrome to ensure complete privacy. It includes phone numbers, addresses, credit card information, and credit card information.
Clearing your browsing history should include the “Autofill Form Data” option.
Google Chrome for Mobile (Android & iOS): Autofill turned off
Notice: These screenshots are taken from Chrome for Android. However, the process for disabling autofill in Google Chrome for iOS is identical.
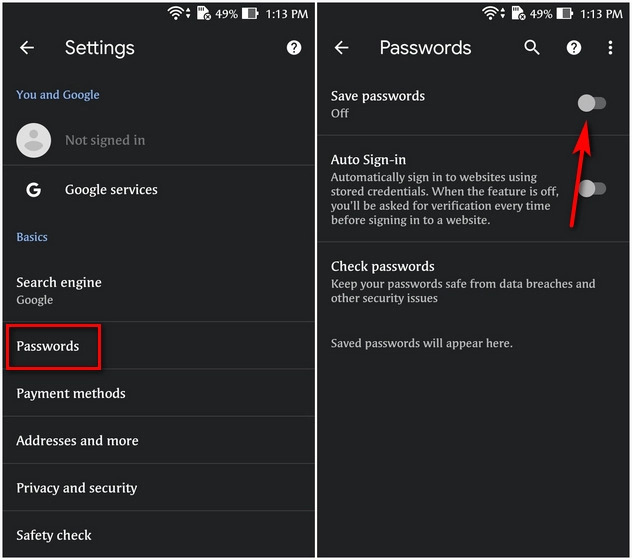
1. Open the Chrome app on your Android device. Next, click on the three dots menu button in the top-right corner. Select “Settings” from that drop-down menu.

2. You can now disable autofill for each of the three categories: Passwords, Payment methods, and Addresses. Tap on “Passwords” then turn off the toggle next to “Save passwords.” To prevent your browser from signing you in automatically, it is recommended that you do not check the “Auto Sign In” option.
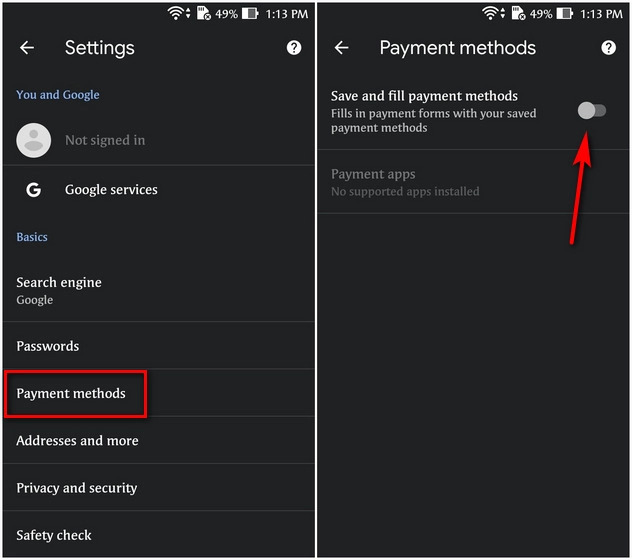
3. Next, return to the Settings page and choose “Payment methods.” Next, disable the toggle for “Save and Fill Payment Methods.”
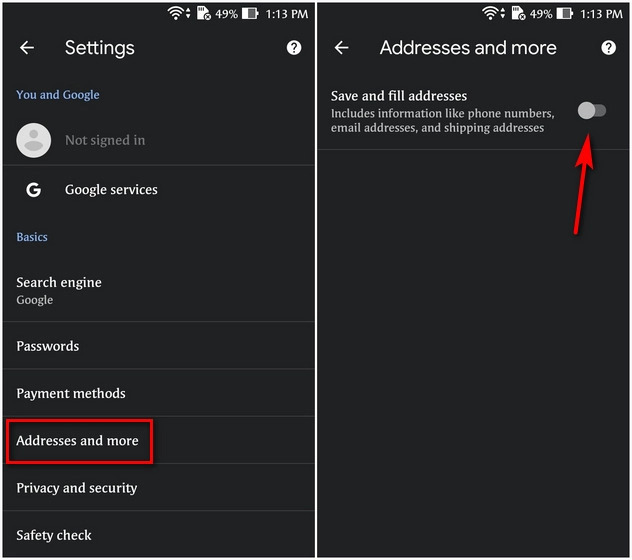
4. Next, disable the toggle next “Save and Fill Addresses” in Chrome. This will ensure that the browser does not save form information or implement autofill on Android and iOS phones.
Remove Autofill Information from Google Chrome for Android and iOS.
Clear your browsing history from Google Chrome to ensure your complete security.
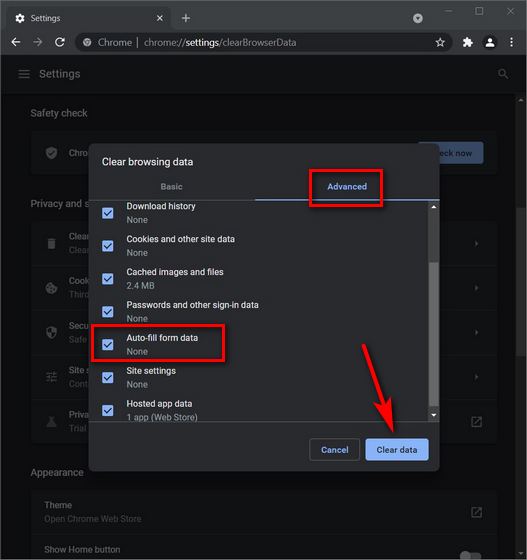
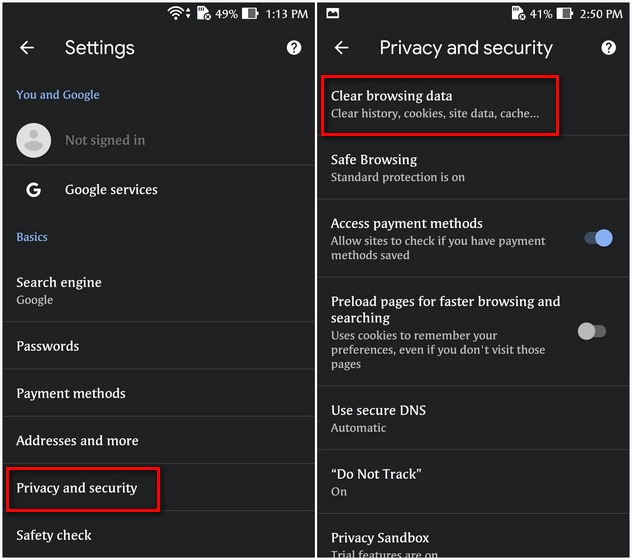
1. This can be done by going to the Settings page, as explained earlier, and selecting “Privacy & security -> Clear browsing information.“
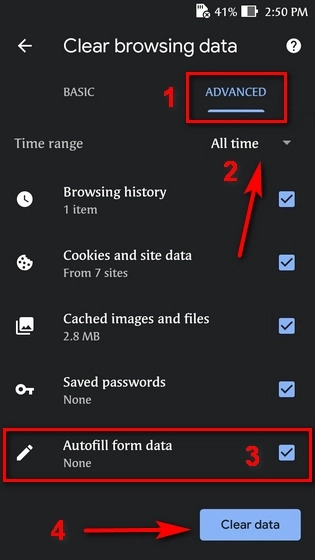
2. Next, click on the “Advanced” tab. Select “All Time” from the drop-down menu beside the Time range. Before you click the “Clear Data,” make sure that the Autofill form data option is turned on.
Retrace your steps to re-enable Google Chrome on your smartphone. Next, switch on the three toggles that you disabled in the previous actions.
You can increase your privacy by turning off autofill in Chrome.
Autofill is an awesome and powerful feature that you should have, as long as it’s not shared with anyone else. It can be a privacy problem if you’re not the only person using the device. It could even cause real-world harm if it falls into the wrong hands. This tutorial should help you avoid such situations.