
Procreate is a good instrument for drawing and illustrating. Including a component of animation to your work is a good talent which you can add to your repertoire. Animation in Procreate is straightforward and doesn’t take rather more studying than utilizing Procreate itself, however there are totally different strategies to make sure a fluid animation.
On this article, we’ll present you the best way to create a movement animation in Procreate.
How you can Create Movement in an Animation
When creating an animation, it isn’t at all times sufficient to simply have a brand new body with a brand new object place. It’s worthwhile to draw every body with reasonable, however exaggerated, actions to really present the movement concerned. We’ll be utilizing the stretch and squash method to indicate the actions of our topic.
We’ll be utilizing Procreate for iPad and an Apple Pencil, however you’ll be able to observe together with the tutorial in case you are utilizing different applications or drawing gear. We’ll make an animation of a ball bouncing on a tough floor.
Draw Your Animation Scene
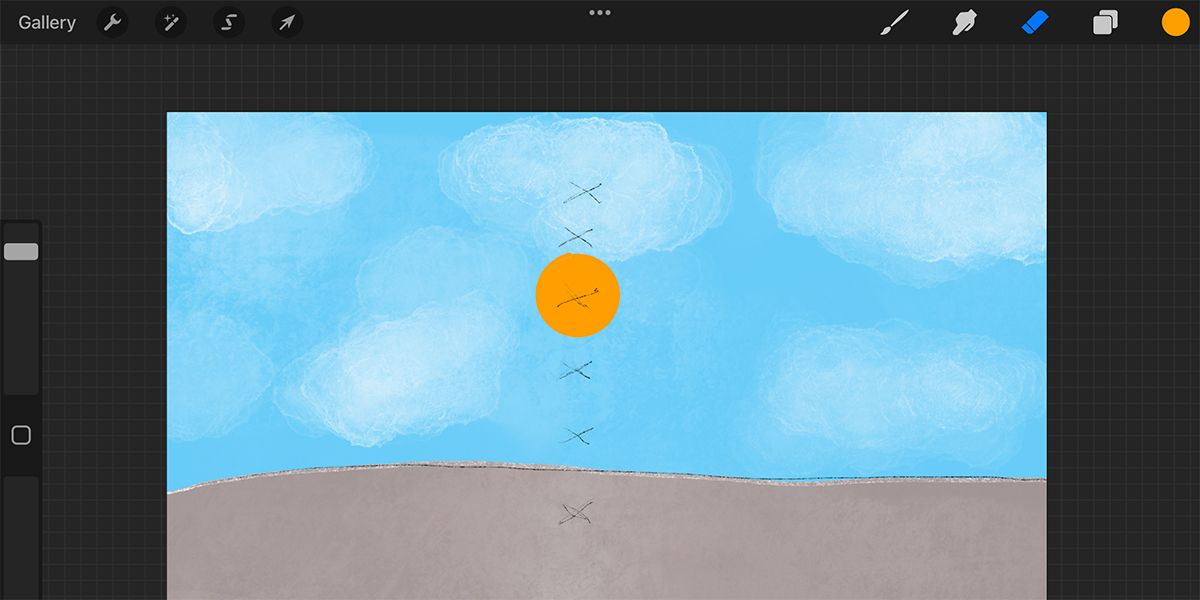
We’re not going to leap proper in with the animation but. First, you want an thought of the scene you’re going to animate. To save lots of on complexity, we’re going to do a easy horizon line with a blue-sky background and a grey concrete flooring the place the ball goes to bounce.
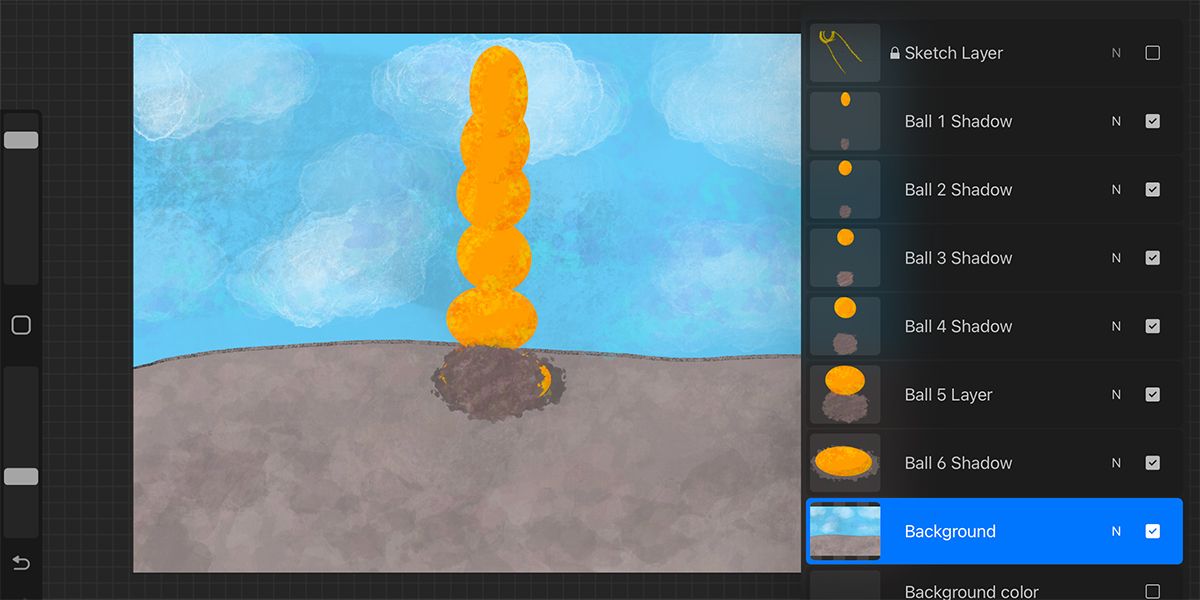
To start with, on the primary layer, draw out a pencil sketch of your scene. Then, draw about 5 – 6 marker factors for the place your ball goes to be in every animation body. You will need to give sufficient house for the ball to alter form because it strikes by way of the motions.
We’re going to make use of an off-the-cuff, tough type for this animation, because it provides it a enjoyable power. On a brand new layer, draw your background scene intimately. Preserve your sketch layer as the highest layer, so you’ll be able to see it as you shade and draw your background scene.
Utilizing Layers for Animation
To create an animation, Procreate makes use of every layer as an animation body. For the reason that background will keep the identical, you’ll be able to lock the background layer. Open a brand new layer in your first ball place.
Whether or not you need to draw an ideal circle or a rougher, much less exact circle is as much as you and your type. We’re going to first draw the ball in a midair place.
Open a brand new layer and transfer it under the primary ball layer. Draw a second ball within the place instantly under the primary one. This needs to be the same dimension and form as the primary ball; you’ll be able to draw it by hand or just duplicate the primary layer and transfer the place.

For the underside ball—the one hitting the bottom—it must squash. To make this squash extra fluid within the animation, the second-to-bottom ball ought to start to squash just a little first. Draw a similar-sized form because the earlier two balls, however make this one barely wider and just a little shorter.
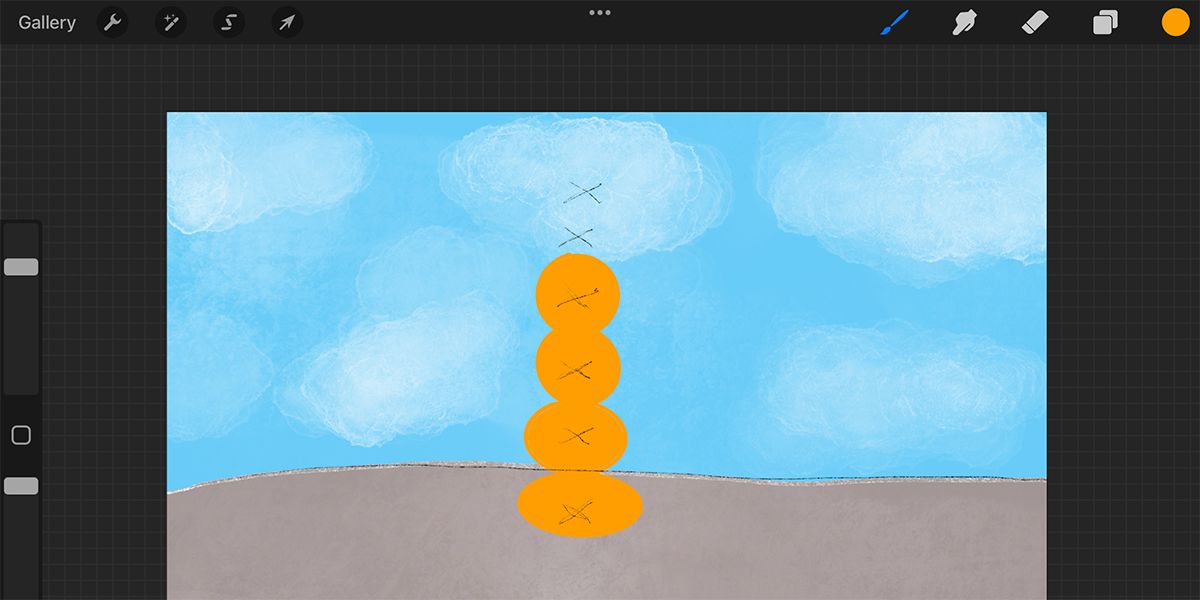
The ball hitting the bottom goes to be probably the most squashed out of all of them. On a brand new layer, draw the ultimate squashed ball in fairly an exaggerated squashed movement. Be sure the layer is the bottom-most layer.

For the best two ball frames, you’re going to do the alternative: stretch. The very best ball can be exaggerated with a protracted and skinny stretch, whereas the ball slightly below it’ll solely be barely stretched.
As soon as you’re proud of the place all of the balls are in your layers, it’s essential to add shadows onto the bottom for every body. This may add extra depth to your ultimate animation by displaying the shadow change with the peak of the ball.
So as to add the shadows, add a brand new layer under the ball you’re drawing the shadow for. Draw a darkish grey circle on the bottom within the form and relative to the dimensions of the ball’s peak. Since we’re drawing the shadow on the bottom, we’re going to make use of a rougher brush: Aurora from the Inventive class.
Not like the frames with the balls transferring place, the shadow will at all times be in the identical place, only a totally different dimension or shade. You’ll be able to toggle the visibility on different layers to see how finest to attract every shadow per ball.
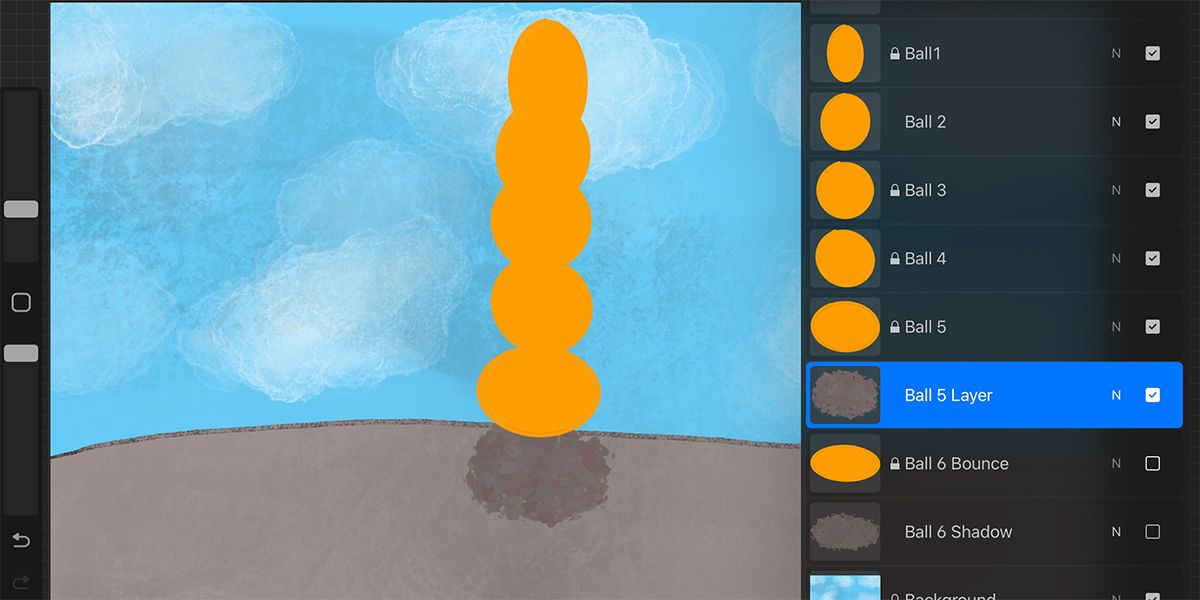
Our easy method is on a brand new layer beneath every ball, merely draw across the ball within the shadow shade and shade it in. Then click on the choice instrument—the white arrow—and transfer the shadow drawing right down to the place the shadow can be on the bottom. Do that for every ball and layer. The top end result ought to have a layer palette with alternating ball and shadow layers, and it is best to have a picture with a pile of shadows on the backside.
Tip: Naming your layers will assist with any confusion.
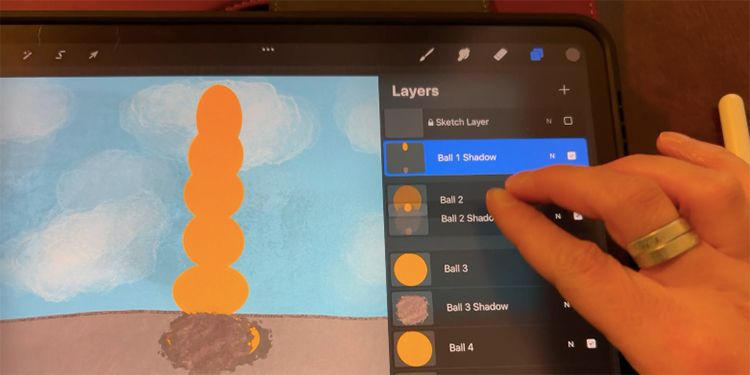
As soon as all of the shadow layers are drawn and have a ball layer to match with, merge the pairs of layers collectively. Utilizing two fingers (one on every layer), push your fingers collectively to merge the layers. Now, as a substitute of 1 layer for every shadow and one layer for every ball, you’ll have one layer containing a shadow and a ball for every ball.
The premise of the animation is full right here. If you wish to add any additional parts to your drawing, resembling shadows on the balls, now could be the time to do it. You’ll be able to delete the sketch layer now as you not want it.
Utilizing Procreate Animation Help
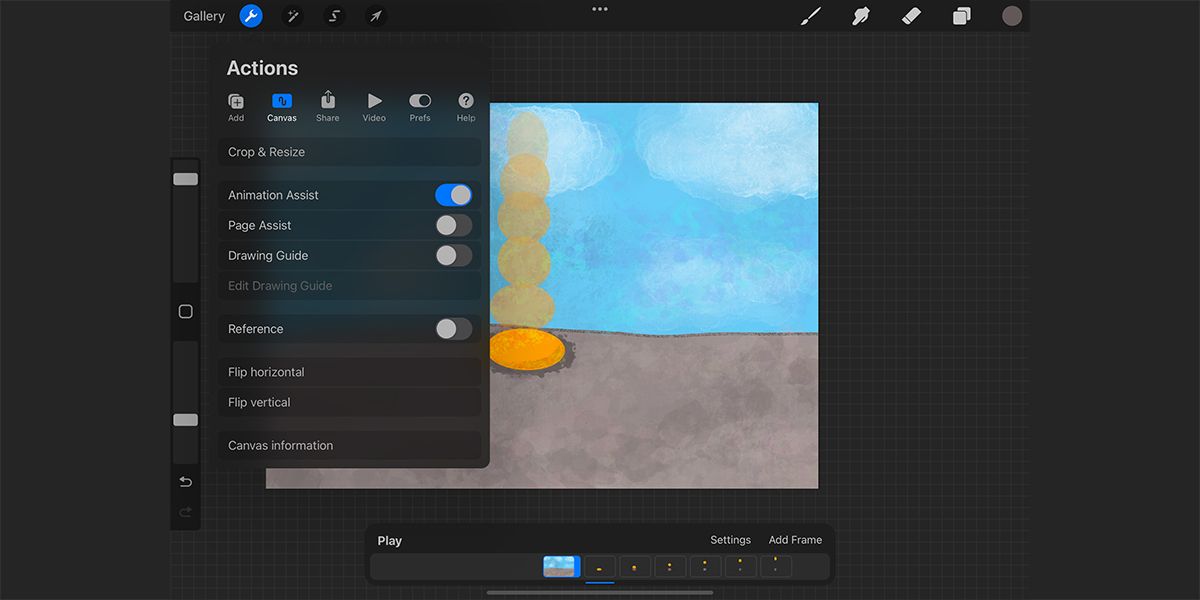
To show your layered picture into an animation, it’s essential to activate Procreate’s Animation Help toggle. Click on the Actions menu (the spanner within the toolbar) and toggle on the Animation Help. This brings up an animation timeline on the backside of your display screen.
Since Animation Help doesn’t know that your background layer is to be the background of all the animation, it’s essential to double-click on the background body within the animation toolbar. This brings up a Body choices menu. Toggle on the place it says Background. This may set your background because the background for all the animation.
Click on the Play button on the animation timeline to see how your animation seems to be at first. Does it do what you need it to?

To vary the pace, loop type, or body types, click on Settings. For a steady loop animation (to make the ball proceed bouncing), click on Ping-Pong. Utilizing Onion pores and skin frames provides the animation extra fluidity, which makes the ball movement seamlessly up within the air and again down once more. The Onion pores and skin opacity will have an effect on this, too, so it is value taking part in round with these options.
Altering the frames per second will change how shortly your animation runs by way of every body. Should you’re proud of the pace, then go away it alone. If you would like it quicker, transfer the bar to the appropriate, or for slower, transfer it to the left.
You’ll be able to press Play between any adjustments you make to see the way it impacts your animation. When you’re pleased, it can save you it.
To save lots of your animation, click on the Actions toolbar and hit the Share button. To reserve it as a transferring animation quite than a flat–and ineffective– picture, you’ve the selection between GIF, PNG, MP4, and HEVC.
Animate Your Future Drawings
Procreate brings a fantastic new avenue to digital artwork. Now you’ve skilled the enjoyable of Procreate’s Animation Help, you should utilize it so as to add an additional function to your illustrations or add animations to movies or webpages. Experiment together with your new talent and see how far you’ll be able to work the animation magic.
Learn Subsequent
About The Writer
